Network Operations🔗
There are a number of common operations that operators may perform on their network.
Network Read-Only Mode🔗
- From the world view click the Topology icon (
 ).
). - In the tab labeled Topology
 , in the Network View, click the Read-Only icon (
 ) .
) .
Note
The read-only mode can be applied to the world and per switch. All levels are honored simultaneously and are displayed on each switch.
World wide read only is automatically set during a CORE upgrade of the vNETC. It is recommended, but not required, to be set for firmware and other major system updates to allow the user to see what unexpected changes may be caused by those actions.
Switch Replacement🔗
The new device should be in ONIE mode.
- Remove the old device from service (
 ).
). - Delete the old device (
 ).
). - In the option box, make sure "Preserve Switchpoint" and "Disable Controller" are selected (
 ).
). - In the Preprovisioned Switchpoint, replace the Device ID field with the new Serial Number or Service Tag (
 ).
). - Go the disabled controller, and update the Service Tag field with the new device Serial Number or Service Tag (
 ).
). - Re-enable the controller
Refer to the ZTP sections for the ZTP process for the switch role (ie Leaf, Spine or Management). The new switch shhould go through ONIE and ZTP process and start communicating with the Device Controller.
Add New Site Note🔗
- From the world view click the Topology icon () .
- From the tab titled Topology and in the Network View, click the Note (
 ) icon
  .
. - Enter the text of the new site note.
- In the same popup, click the Save icon.
Device Operations🔗
Inspecting devices and performing operations on them is accomplished in the Switchpoint object in the Topology view.

Using Device Operations🔗
Zoom to a device by double clicking on it in the topology map.

How to Reboot a Switch🔗
Zoom into the network operations and click the reboot button.

Device Locks🔗

Locking a device restricts users without [NW] Network privileges from editing it. ( )
)
To use the locking feature the Granular Permissions feature flag must first be enabled. ( )
)
To Lock a Device:🔗
- From the world view click the Topology icon () and select the Topology tab .
- Zoom in to the top of the device
 .
. - Click the lock icon (
 ) .
) .
Device Operational Tools🔗
| Icon | Name | Function |
|---|---|---|
 |
Show the current switch configuration | Show current switch configuration |
 |
MAC Address Search | Search for a MAC address on this device |
 |
System Log | View the system log |
 |
Highlighter | Highlight the device on the topology map |
 |
Edit | Edit the device settings |
|
Lock | Locks the device |
 |
Delete | Delete object |
 |
Manage Switch Pairs | Add Switch Pairs |
 |
Opens Ping/Traceroute Dialog | Open Ping/Traceroute Dialog |
 |
Capture Snapshot | Capture a snapshot of this device for troubleshooting - press once to start capturing and then again when capture is complete (icon turns dark green) |
 |
Rescan | Trigger a full rescan by the ACS of this device. |
 |
Open Tunnel | Open a remote access tunnel |
 |
Report | Open report |
 |
Reboot Device | Reboots Device |
 |
Out of Service | Mark device out of service. |
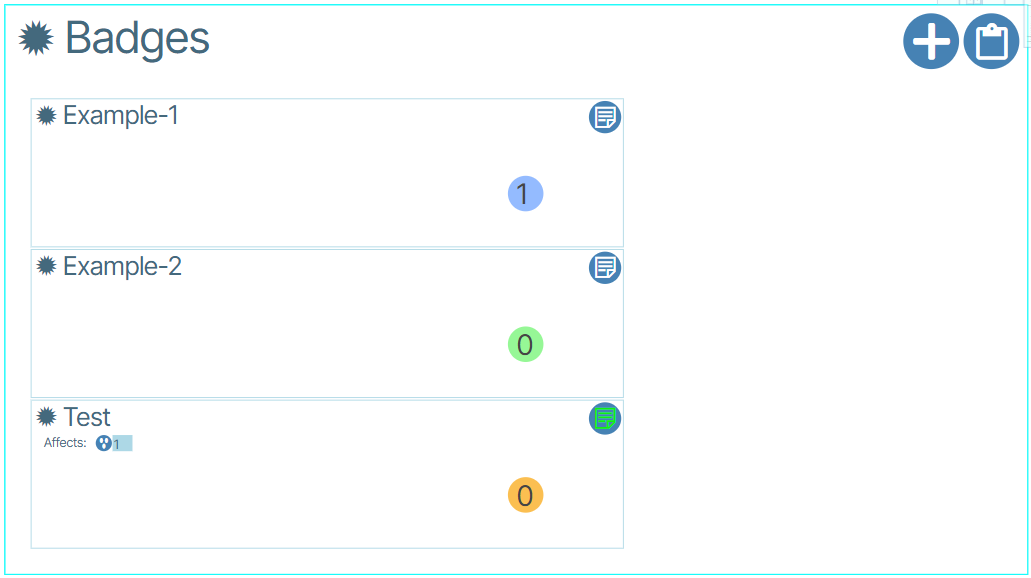
Badges🔗
Badges are used to group devices visually. Badges are assigned a name, a color and a number.
Create and Assign Badge to Device🔗
- From the world view click the Topology icon () . Enable the tab titled Topology .
- Enable focus of a selected device.
- Click the Edit icon.
- Click set badges icon (
 )
)  .
. - Enable the check-box next to the phrase Create New Badge
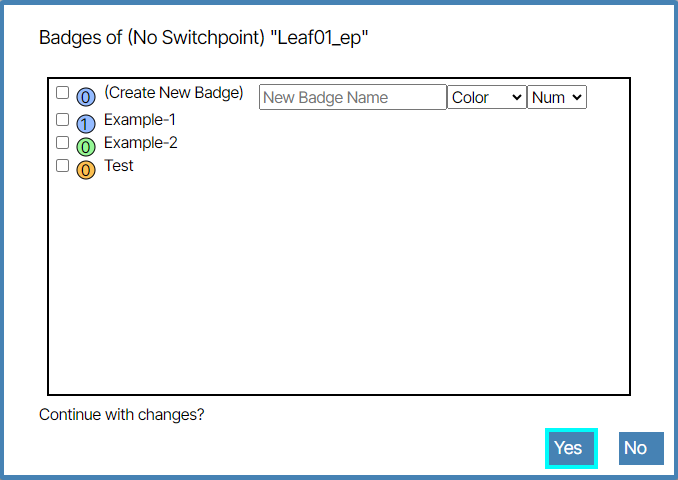 .
. - Set a Name, Color and Num for the badge.
- Click Yes to create the badge.