Inter-Tenant Routing🔗
Single Tenant-to-Tenant Routing🔗
Before this feature is performed the selected Tenants must enable their feature Layer-3 Anycast IP/Mask on a service.
- Enable the world view by clicking the World Icon.
- Double-click the Tenants tile.
- Double-click the tile of the Tenant you want edit.
- In the tile titled Tenant Slice double click the tile titled Tenant-Tenant Routing.
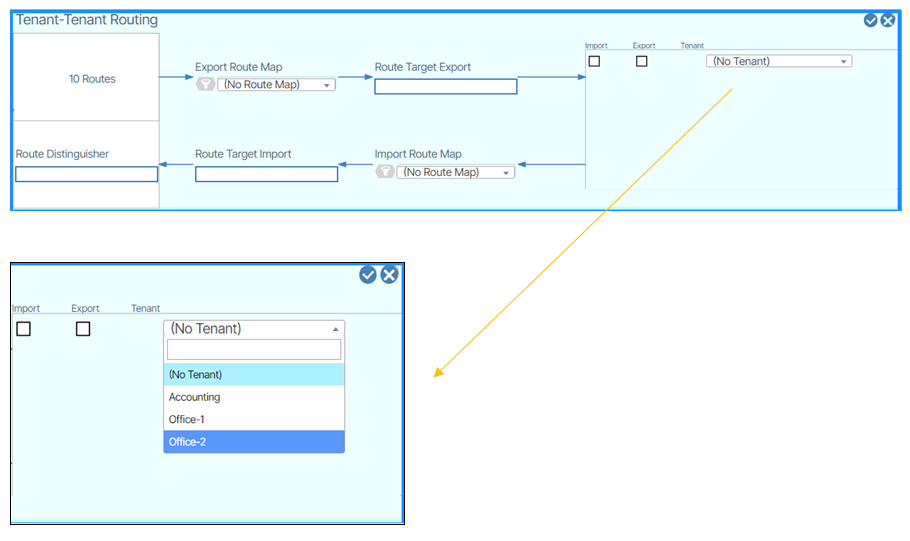
The window that appears contains a diagram representing the flow of inter-tenant communication. Here is where you create Tenant-to-Tenant associations, set Route Maps, and apply Route Target and Distinguisher settings.
To create an inter-tenant connection you first need to select a Tenant to connect with.
In the imports tile select a Tenant of your choice and click the Enable checkbox next to it. To add more Tenants repeat the Import process.
Bidirectional Tenant-to-Tenant Routing🔗
To configure two-way Tenant Routing, complete the above steps to enable single Tenant to Tenant Routing.
- Click the HEX navigation Icon of the Import Enabled Tenant to jump to its controls.
- In the Tenant Slice window double-click thee Tenant-Tenant Routing window.
- Edit enable the window and select the desired Tenant
- Check the corresponding Enable Import checkbox to activate it.
When you view the Tenant-Tenant Routing for bi-directional Tenants, both Tenants display their connection to one another in their Imports window.
Tenant-to-Tenant Routing with Route-maps🔗
Route Maps need to be created before you apply them to Tenant-to-Tenant routing. Creating Route-maps is a separate process. Additionally, applying Route-maps to Tenant-to-Tenant routing requires that Tenant-to-Tenant routing is already configured.
- Enable the world view by clicking the World Icon.
- Open the Tenants tile by double-clicking it.
- Double-click the Tenant tile you want to work with.
- In the Tenant Slice window double-click the Tenant-Tenant Routing tile.
- Set the values of the following 5 form fields as needed for your configuration:
- Route Distinguisher
- Route Target Import
- Import Route Map
- Route Target Export
- Export Route Map
TODO - Add/merge below
You edit the window by clicking the Edit  button.
Select a Tenant.
To add more than one Tenant click the Add row to this Tenant ( ) button.
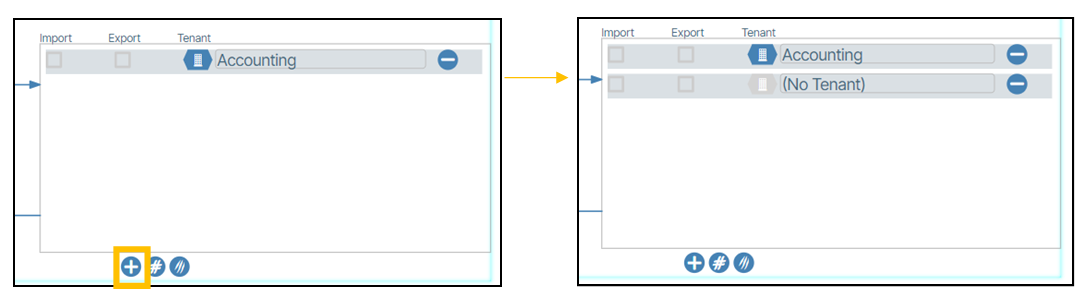
To enable a connection you click either the Import or Export checkbox.
